Diamond Jubilee Goldwork
My post Coronation and Diamond Jubilee Goldwork described how technically difficult and time-consuming it is to embroider the incredible goldwork that can be seen on royal, religious, ceremonial and military robes.

![]()

![]()

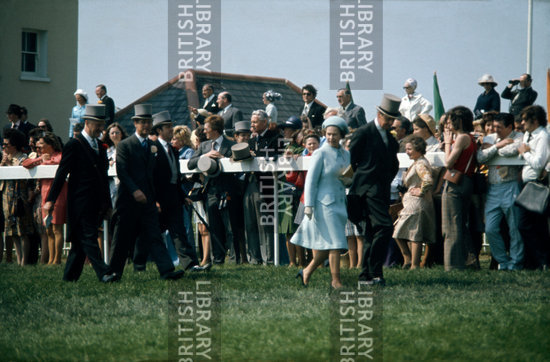
Above are some of the heraldic and religious ceremonial robes (many at least a hundred years old) from Tuesday’s Service of Thanksgiving at St Paul’s Cathedral for Queen Elizabeth II’s Diamond Jubilee. All robes are heavily embroidered with goldwork and must have been extremely heavy and uncomfortable to wear.
Today’s post concludes the story of my own goldwork embroidery which I undertook under the tutorage of the Royal School of Needlework as part of their Certificate in Technical Hand Embroidery.
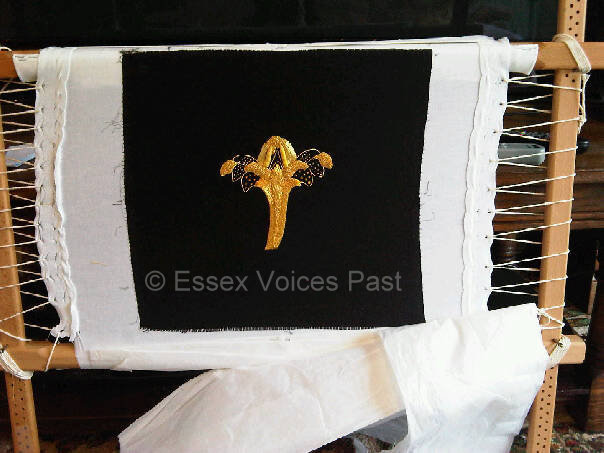
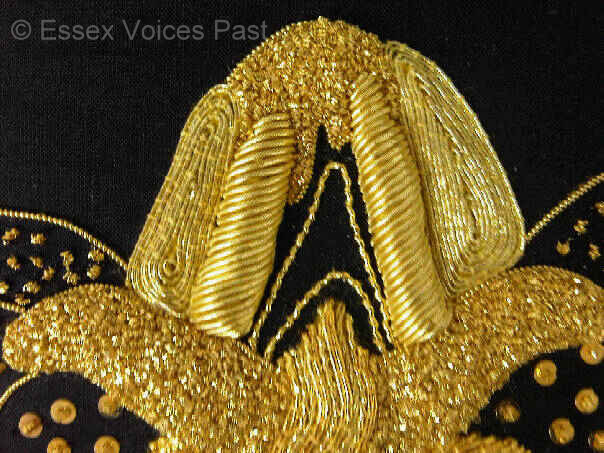
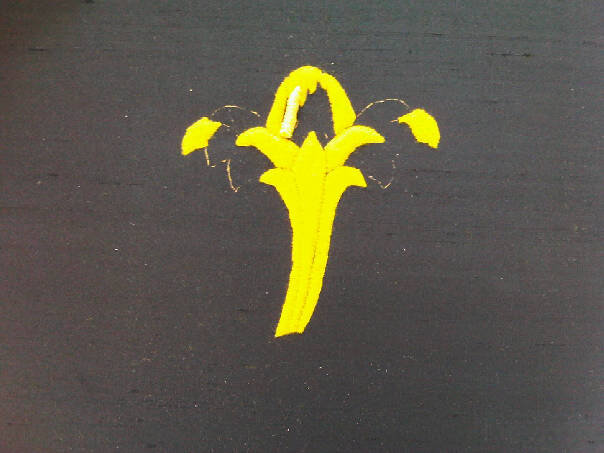
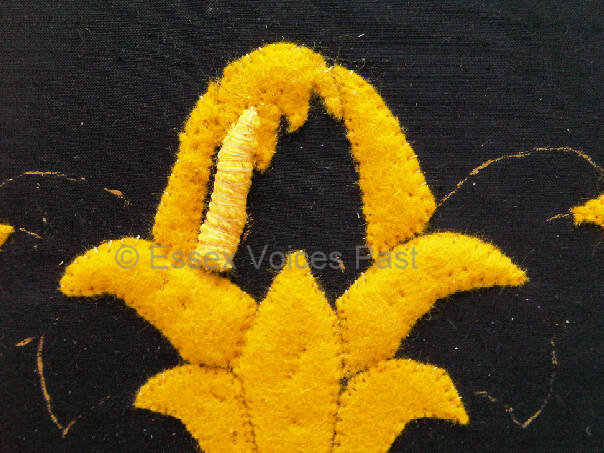
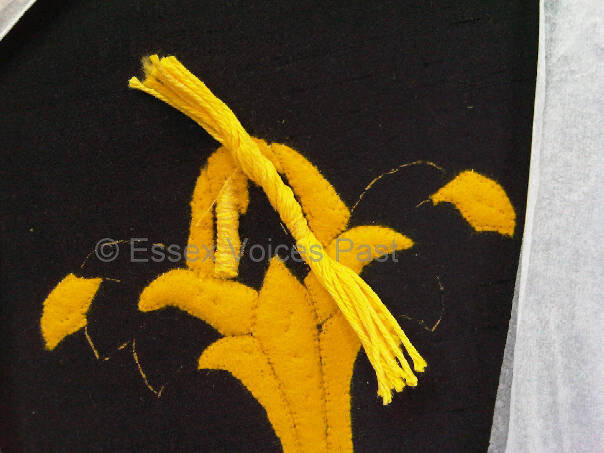
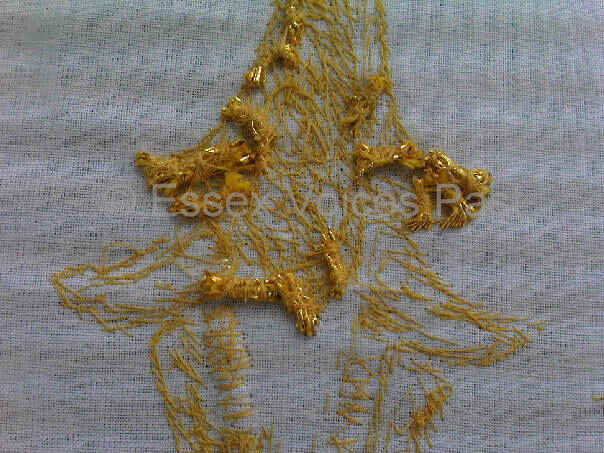
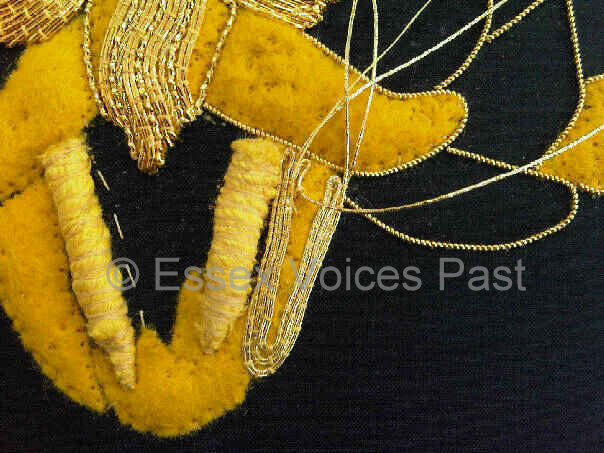
 Day 8 – chip work. The dents in all the yellow felt are where I’ve started or finished a thread. A new thread is started by doing several tiny stab stiches (starting on top of the work) in an area that is going to be covered up later with stiches. No knots and no starting or finishing on the back of the fabric! In fact the only time you turn the fabric over is when securing plunged gold thread
Day 8 – Not too much fluff on the work – although there’s a couple of areas where there’s beeswax in tiny smudges
Day 8 – my working area. The metal object that’s part way on the purple velvet cutting board is called a mellor. It helps you to stop touching the gold and also to manovre the thread into exactly the correct place
Day 8 – the spots on the purple cutting board are a few gold chips ready to be sewn down
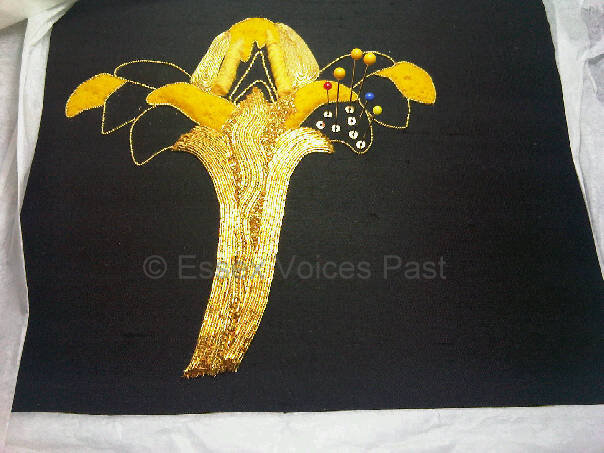
Day 8 – pins marking out the exact place where the spangles are going to be sewn down
Day 8 – first set of spangles. Each are sewn down with a tiny gold chip of bright check placed in the middle
Day 8 – both sides with spangles & gold chips
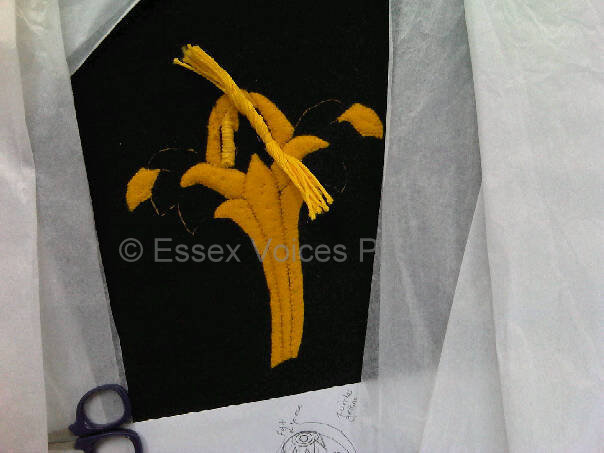
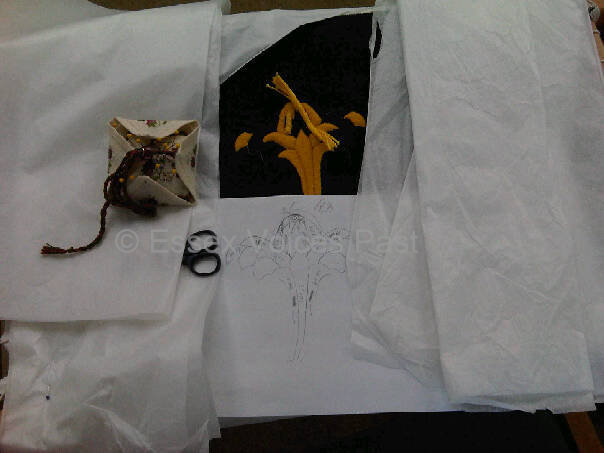
Day 8 – so much tissue paper to protect my work!
Day 8 – more chipping needed! However, the race is on because the gold threads already embroidered will start to tarnish (particularly in the chipping area) but the new bright check thread to be turned into chips will be all bright and shiny. It all needs to tarnish at the same rate.
Day 8 – all goldwork will eventually tarnish – some areas faster then others depending on the alloy in each type of metal thread. This is accelerated the more the threads are touched as moisture, grease etc from hands are transfered onto the threads and will spead up the tarnishing process. All gold thread should be kept in glycerine bags and then kept in a dark box/cupboard. Plastic bags should not be used because of moisture in the bags will attack the thread.
 Day 8 – looking good! Although according to the RSN by the end of day 8 my work should be finished and mounted ready for marking. However I had to do a lot of work at home and completed all the chipping areas during several lengthy sessions of sewing just the bright check beads. This was surprisingly very therapeutic and I did the embroidery whilst listening to the audiobook of Hilary Mantal’s Wolf Hall on my iPod!
Day 8 – RSN trestles used for resting the slate frame on. These trestles are hand made for the RSN and are nearly £400 per set!!
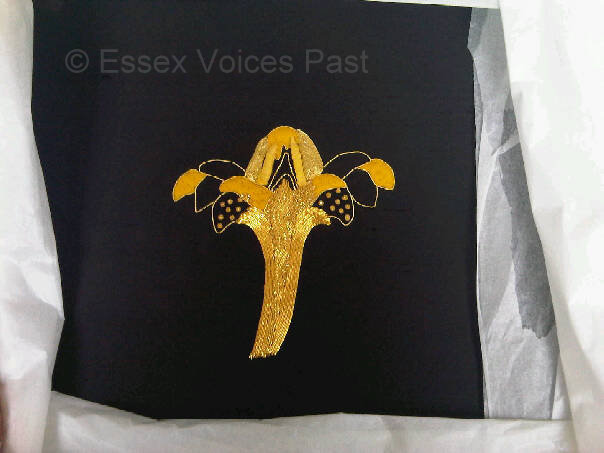
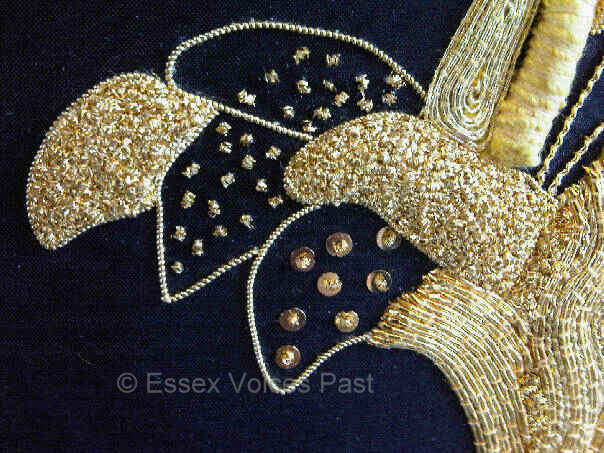
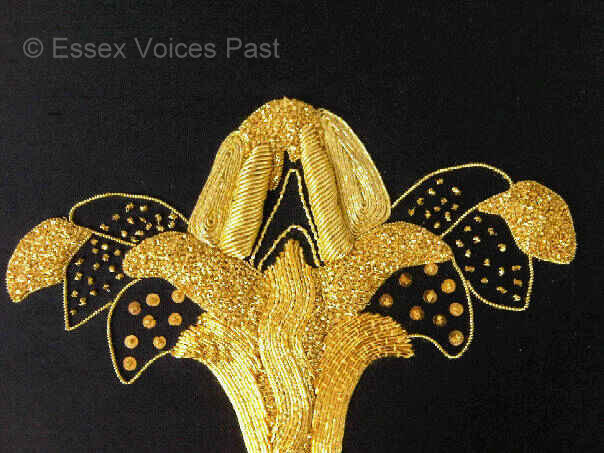
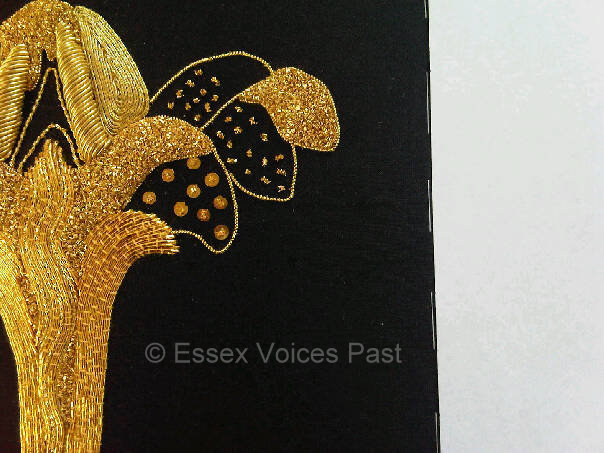
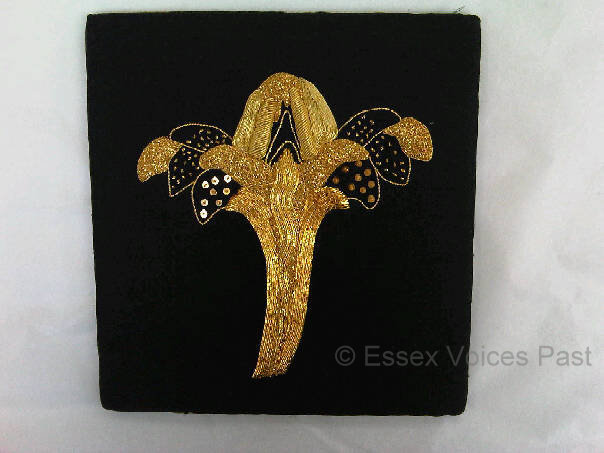
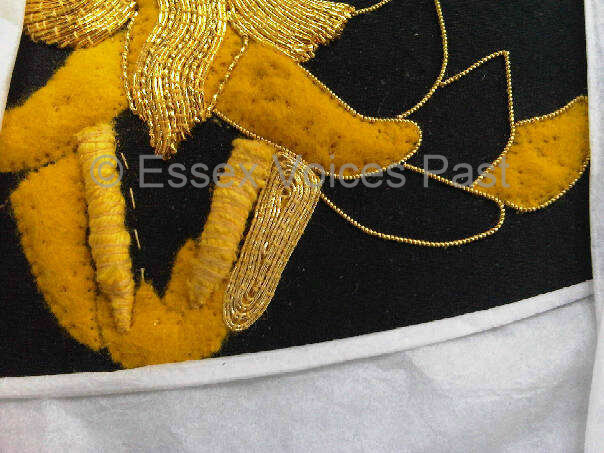
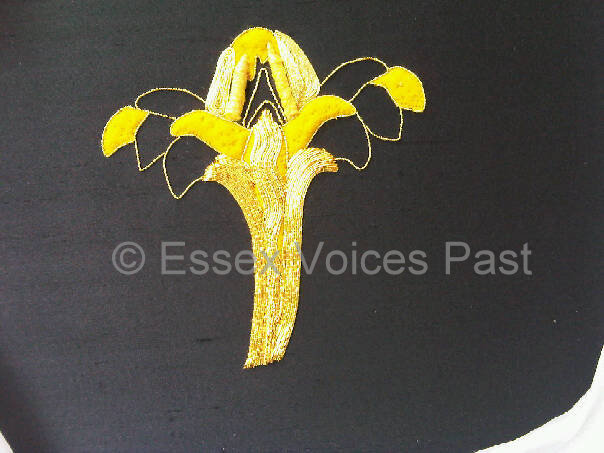
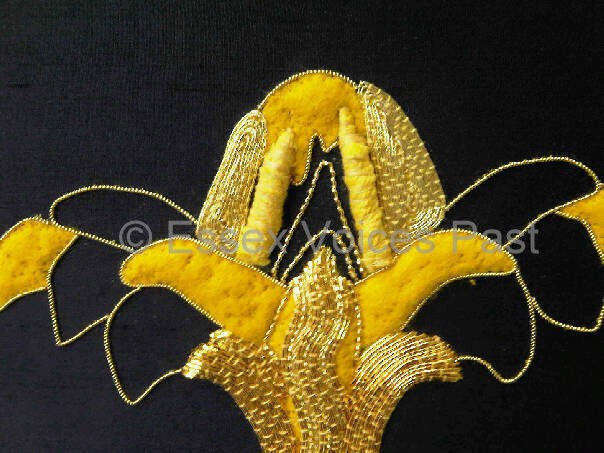
Homework – Crown all done in bright check chips. The two ‘leaves’ above both sets of ‘spangled’ leaves are now fully bright check chipped. This all took about 7 hours to do
Homework – Only two areas of yellow felt now left to be sewn with bright check chips
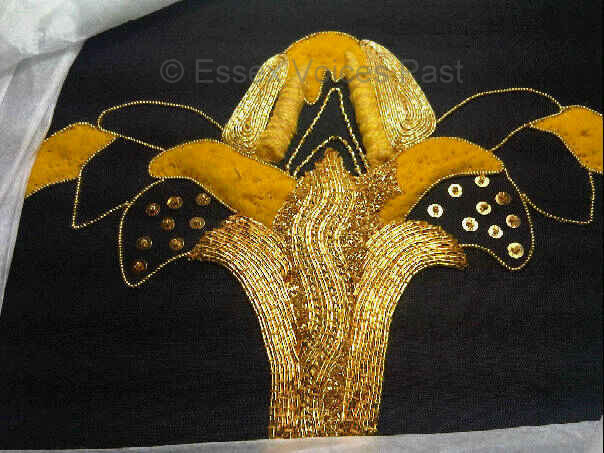
Full of Essex girl bling!
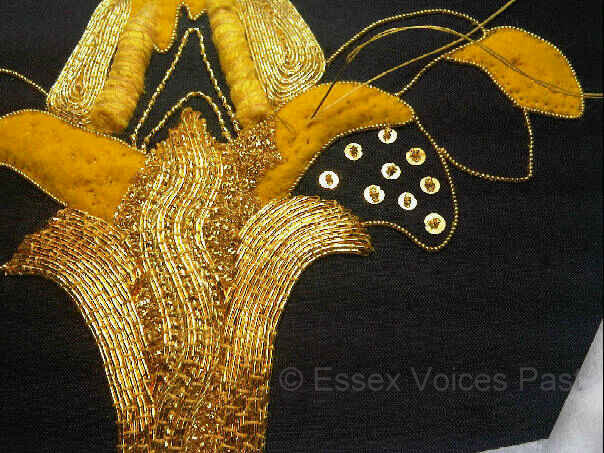
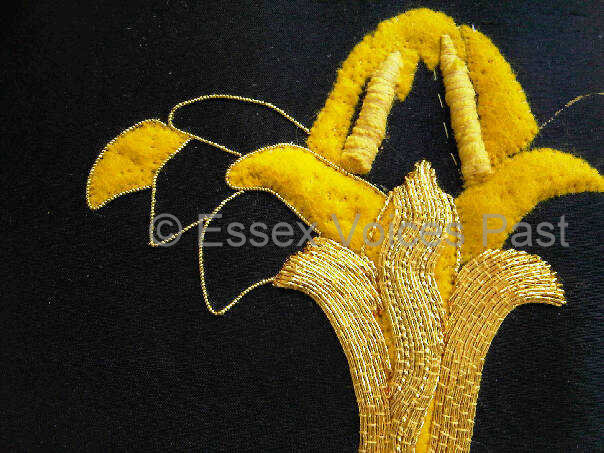
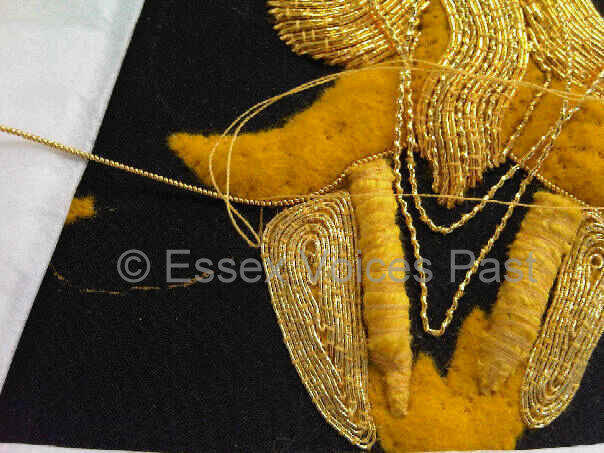
Nearly finished – all the bright-check chip work is finished

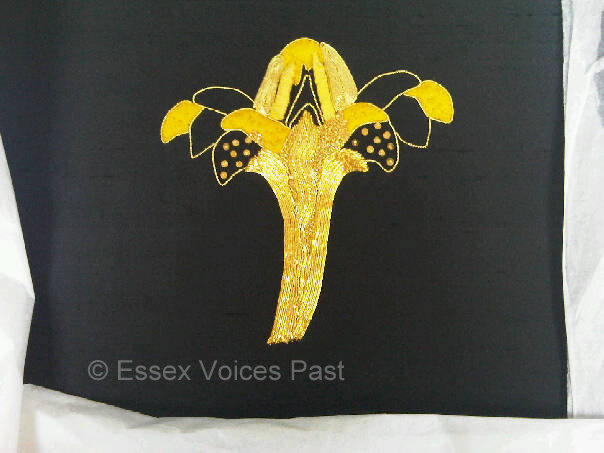
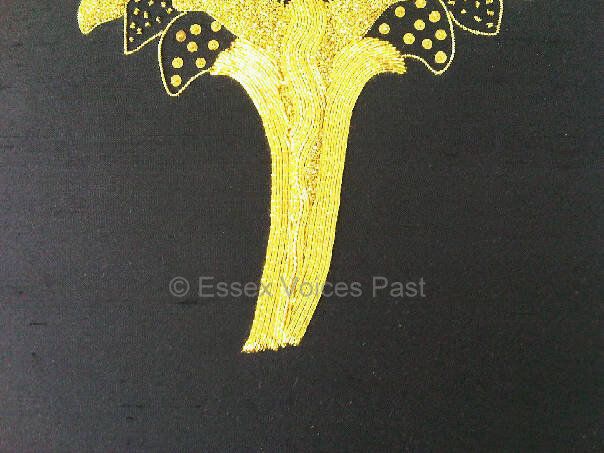
Only the gold cut-work to be done on over the yellow soft-string padding
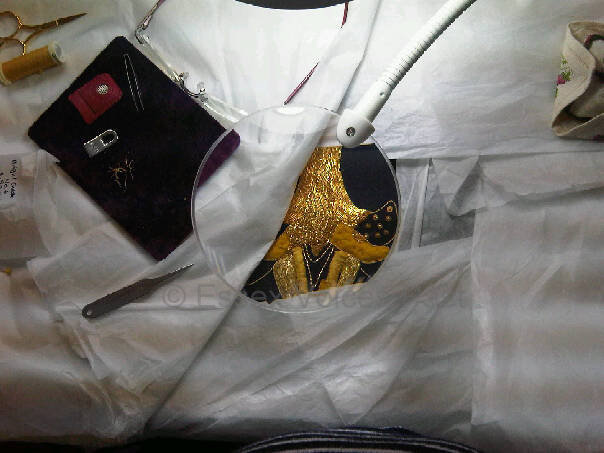
Still in it’s embroidery frame. The work has to be cut from the frame and then properly mounted.
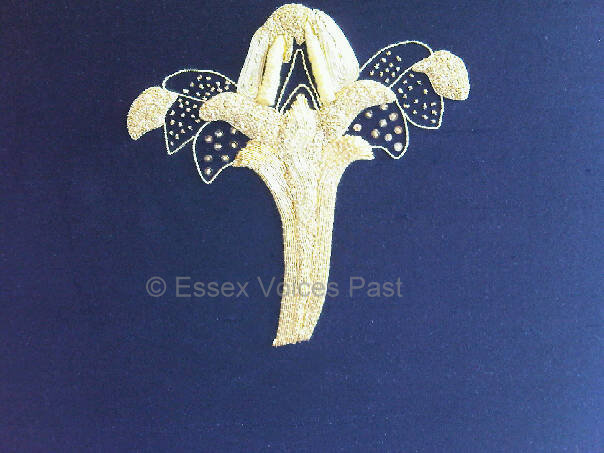
Bling!
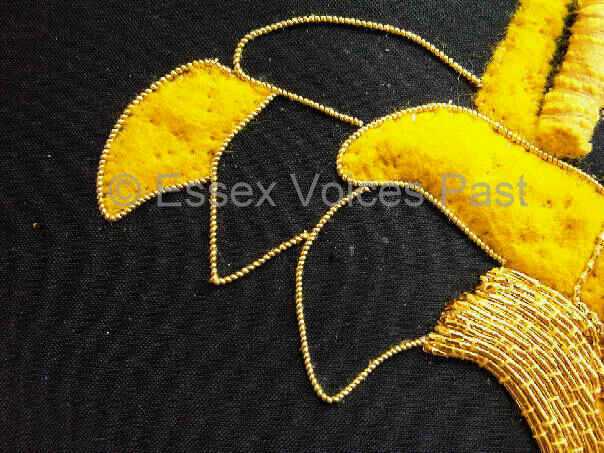
The remaining area to be embroidered
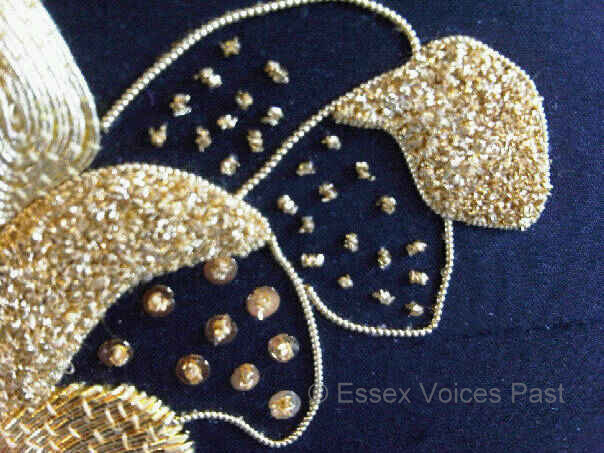
Spangles and bright-check chips
More spangles and chips
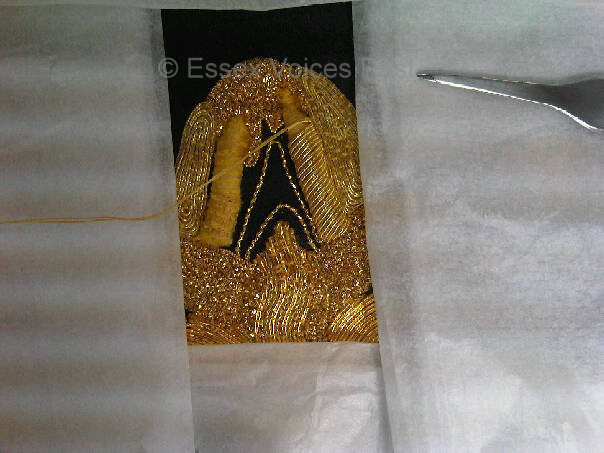
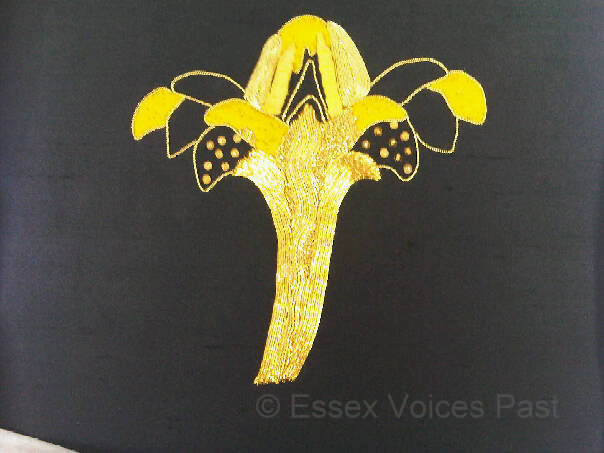
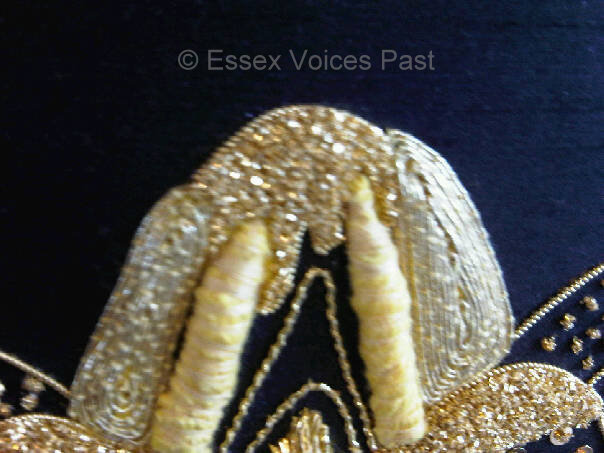
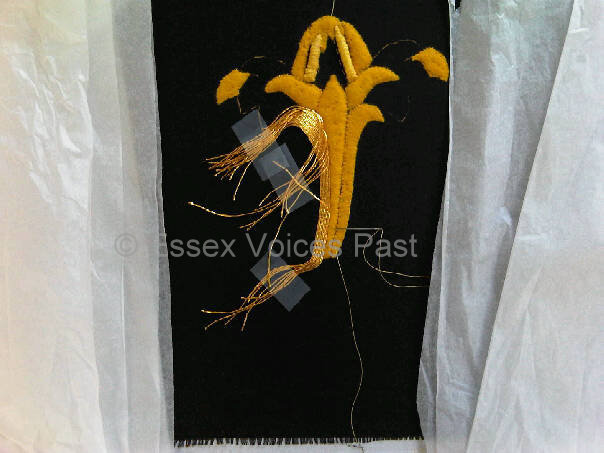
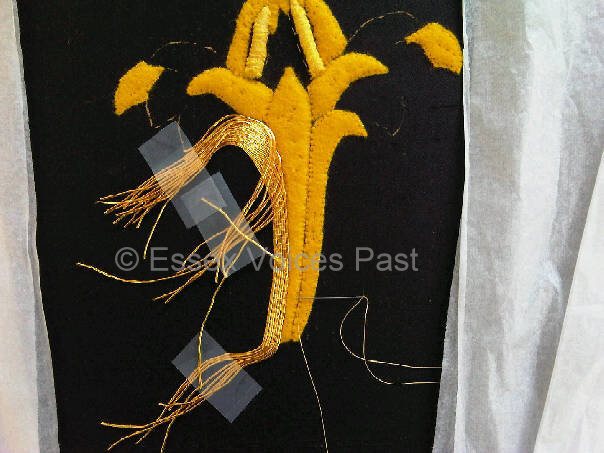
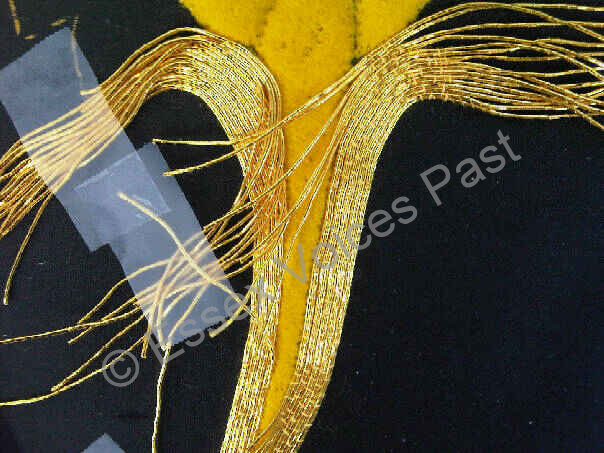
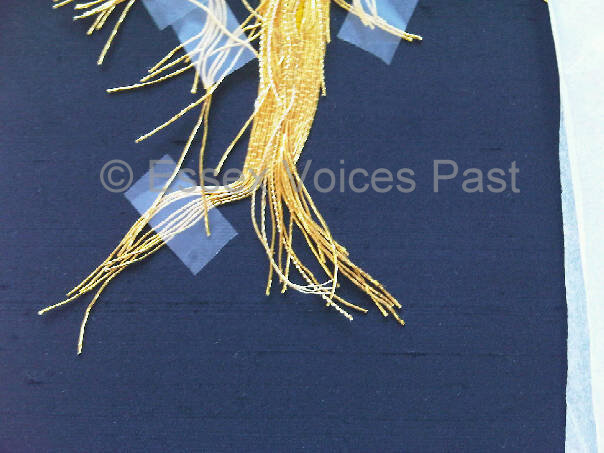
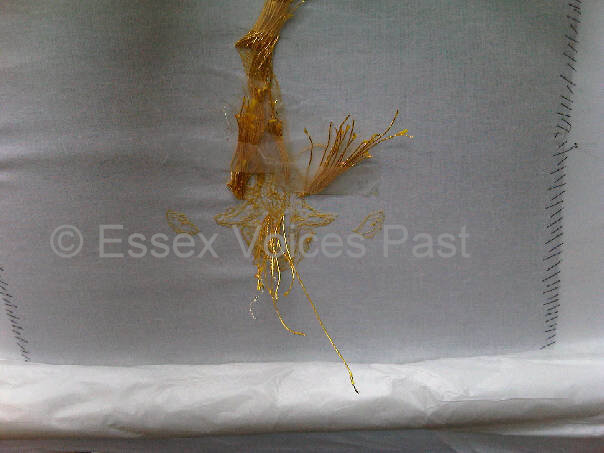
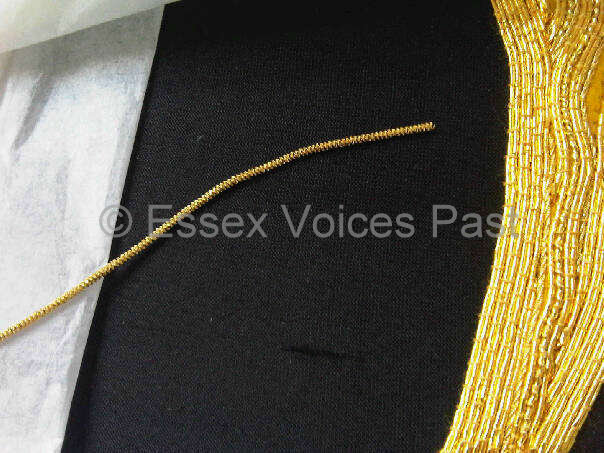
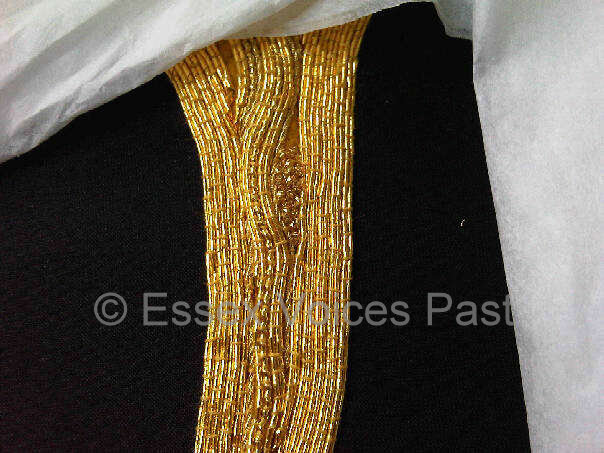
Day 9 – Cutwork – This part was by far the hardest to do. The few stiches in this picture took me nearly 3 hours! The gold splits and cracks very easily. If that happens, the stitch has to come out and a new piece of gold has to be cut and sewn in.
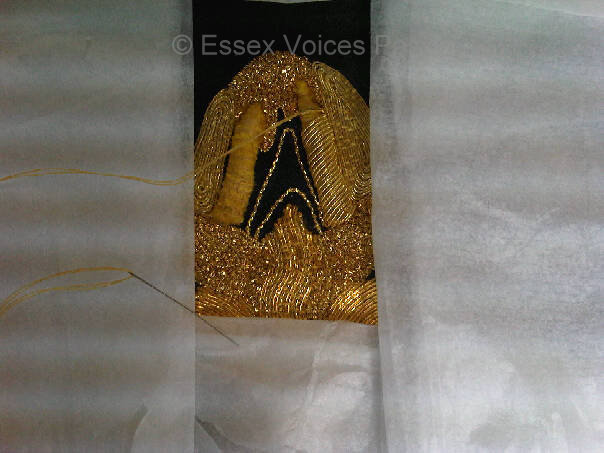
Day 9 – Cutwork – The gold has to be cut to the exact length – 1mm too long and the gold will crack & split as it is sewn in. 1mm to short and you will be able to see a gap. Both not allowed and will be marked down. So it’s precise work. The angle has to be perfect to. I have the habit of flipping my angles (I’m dyslexic and dyspraxic) and I find it very difficult to keep the correct degrees
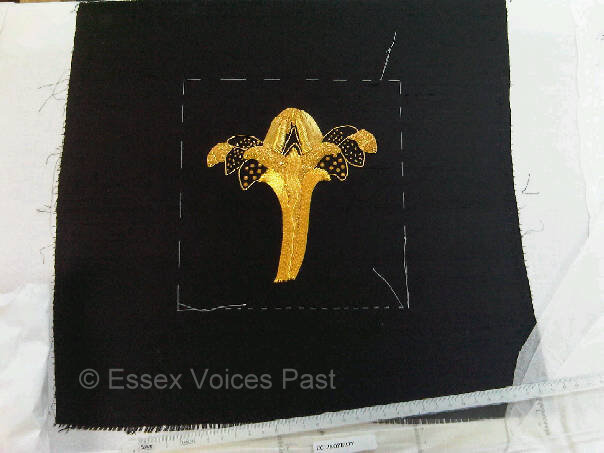
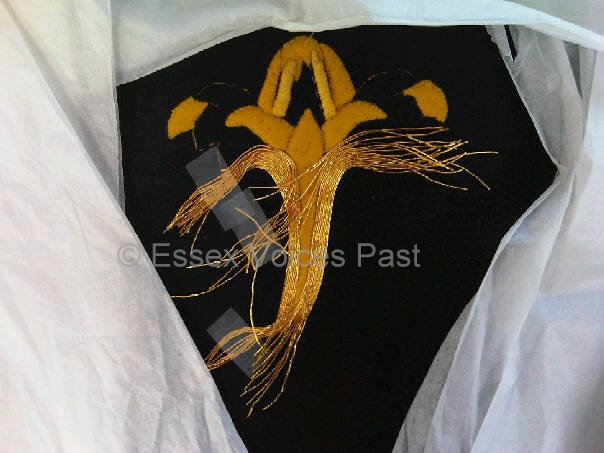
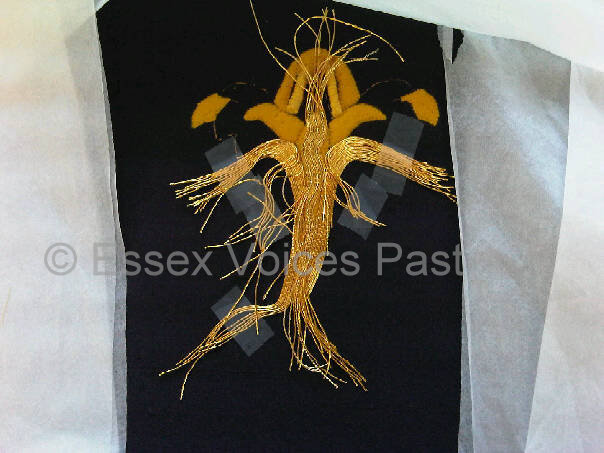
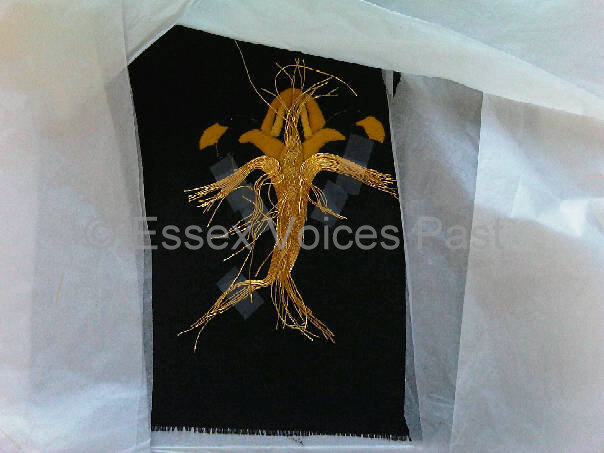
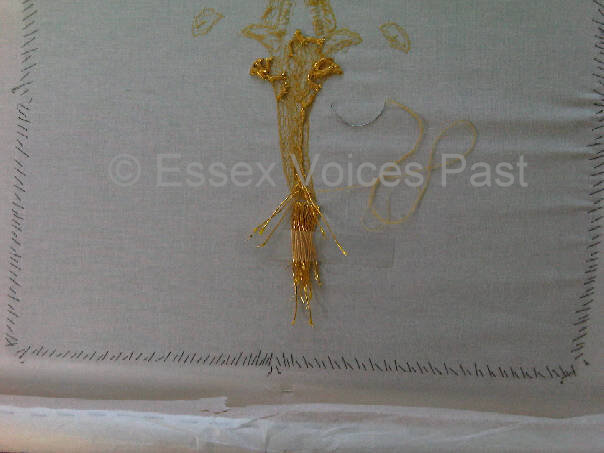
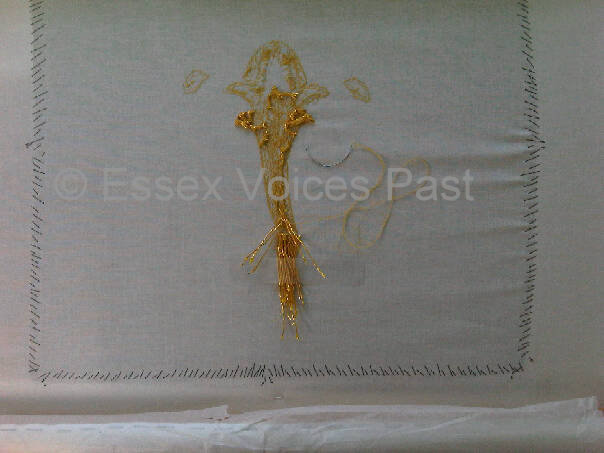
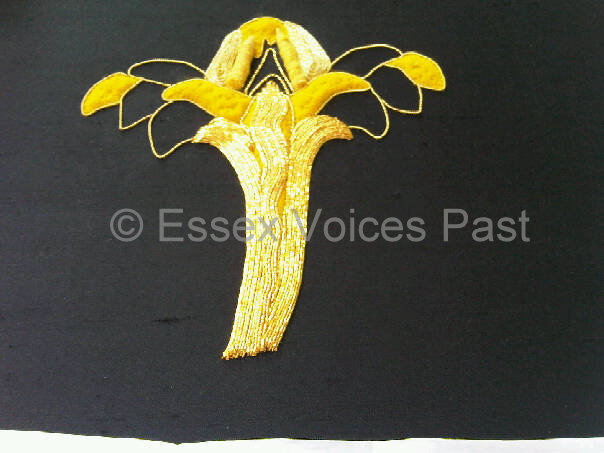
Day 9 – Embroidery finished.
Day 9 – Cutwork – another problem is that you very easily loose your bearings on where the needle is going to come out (as you can’t “feel” the needle from the top side). Quite a few times, my needle came out exactly in the middle of a piece of gold – which, of course, then splits it and wrecks the stitch. So out comes the stitch! For every stitch you see on my dialgonal cut work, at least 3 others had to be ripped out and resewn. These 2 strips of cutwork took me 6 solid hours to do!
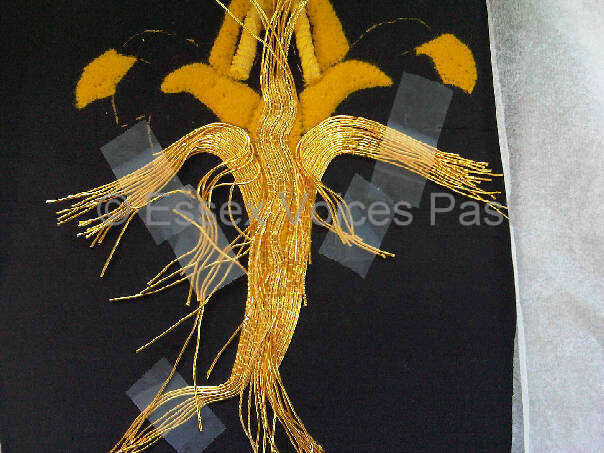
Day 9 – Top section
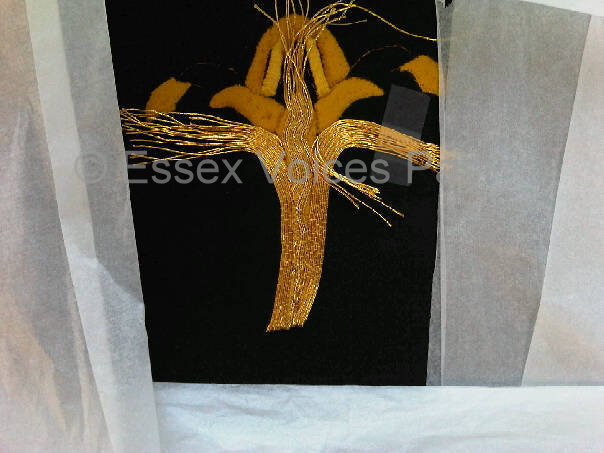
Day 9 – Bottom section
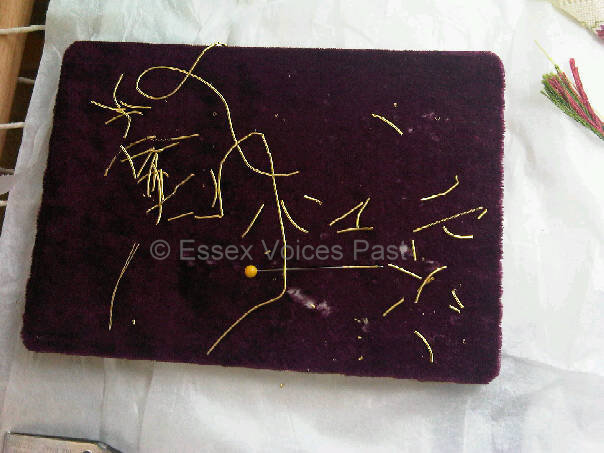
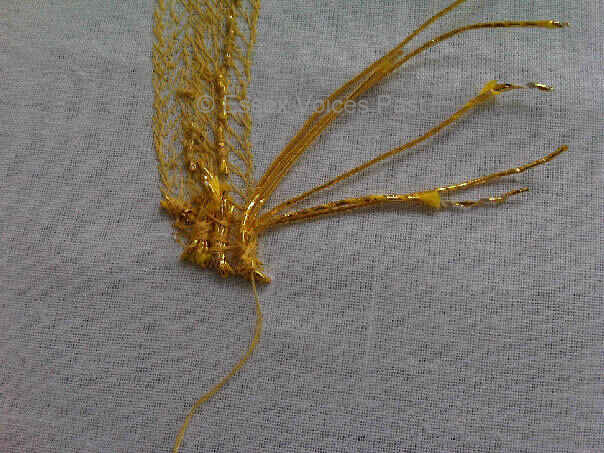
Day 9 – The debris from doing my cutwork. Lots and lots of pieces of gold that I’d either a) sewn in and then had to rip out (too short, too long, cracked, split, uncoiled) or b) had cut but never got to sew them in because they were wrong (eg split when they went on the needle or cracked because I looked at them the wrong way!)
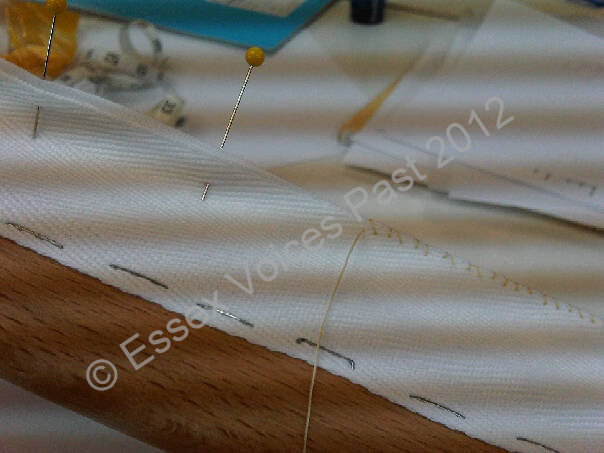
Part of the Certificate in Technical Hand Embroidery is to learn how to properly mount a piece of fine embroidery (without glue,cello-tape or staple gun!!). This part of the course was just as hard as the embroidery and required brut force at many stages to force my embroidery to come together properly.
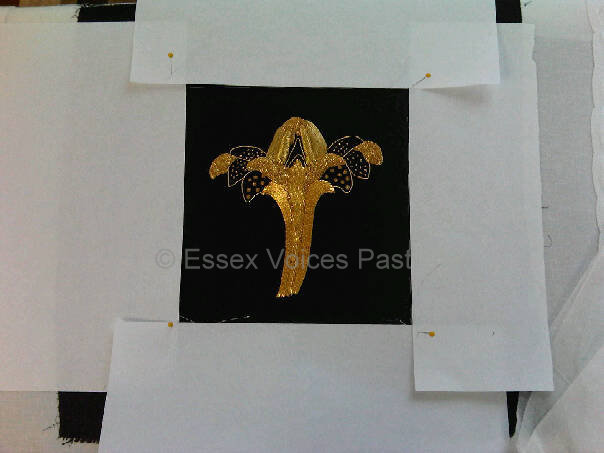
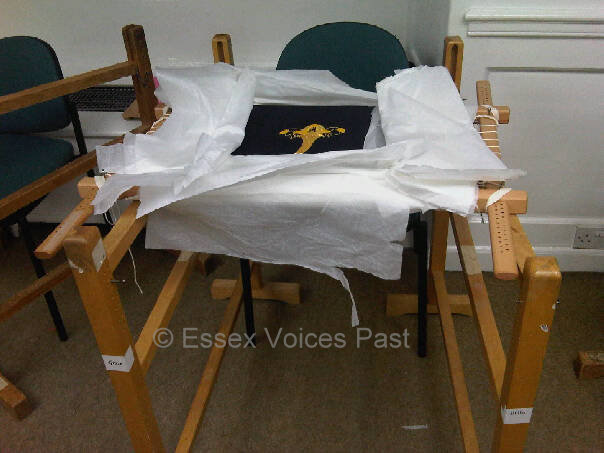
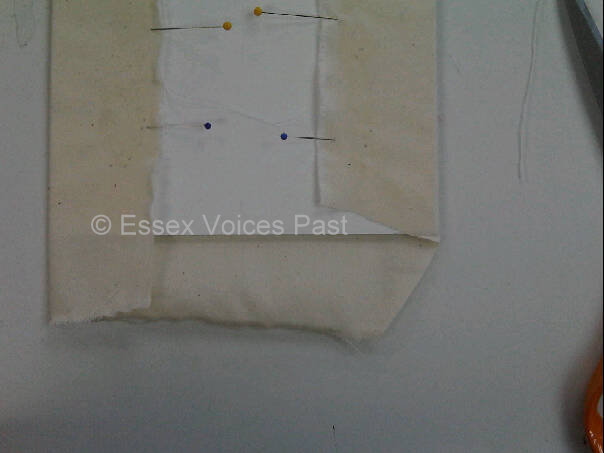
Day 10 – Mounting. My work is still in it’s embroidery frame. So here I’m using paper to meausure out how big the mount is going to be
Day 10 – Mounting. A running stitch is sewn all along the edge of the paper to give guidelines. This photo shows the running stitch on the right hand side of the work
Day 10 – Mounting. The running stitch is now marking out where the mount is going to be
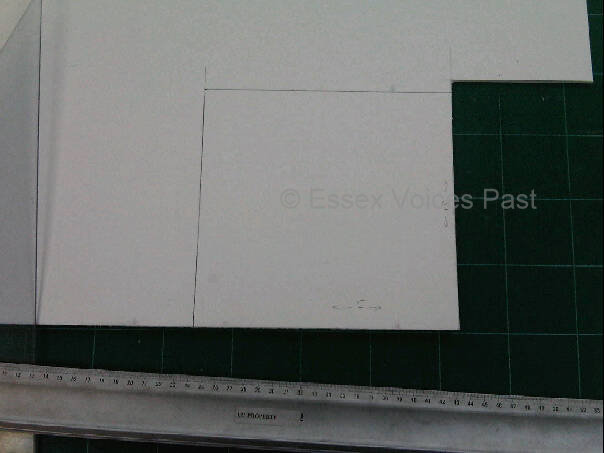
Day 10 – Mounting. Measuring and cutting out the carrdboard mount. This is extremely thick conservation cardboard (either class 1 or Class A – can’t remember which)
Day 10 – Mounting. Underneath the cardboard is wadding. I can’t remember it’s name but it’s a type of wadding that I’ve never seen before – it looks a bit like a very soft baby’s wool blanket. Then a piece of calico is glued into place. Only a tiny bit of glue is used in strips just on the back of the cardboard. Of course it’s conservation glue!
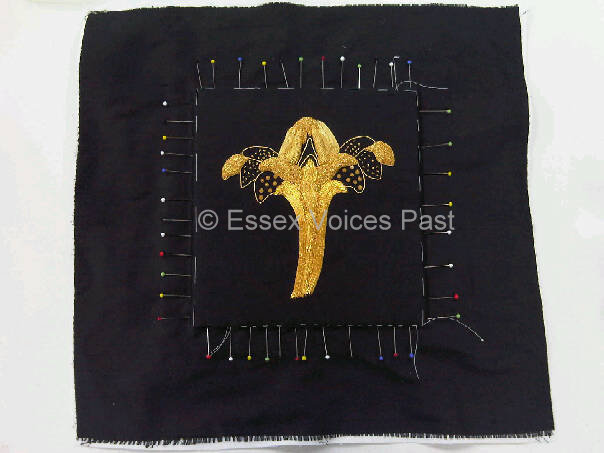
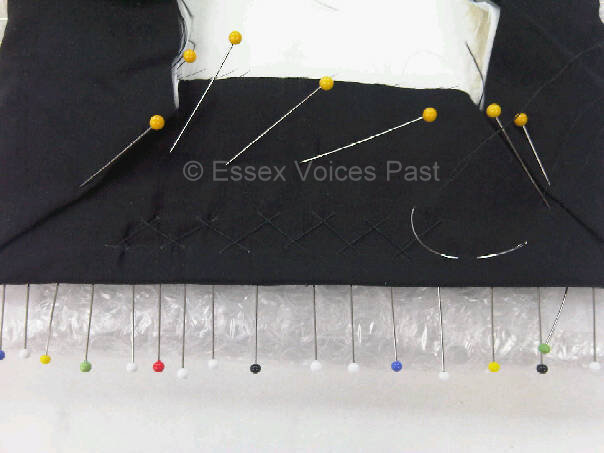
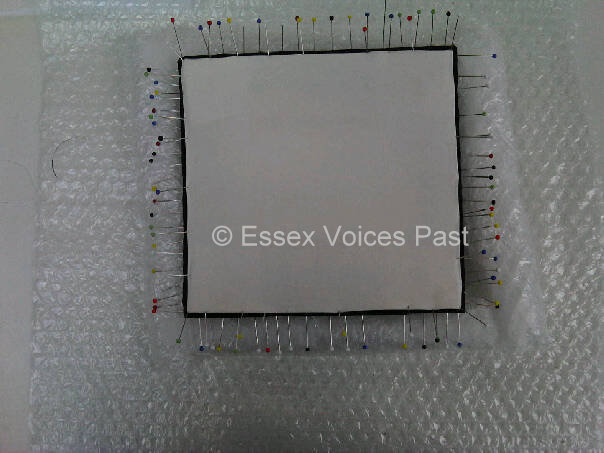
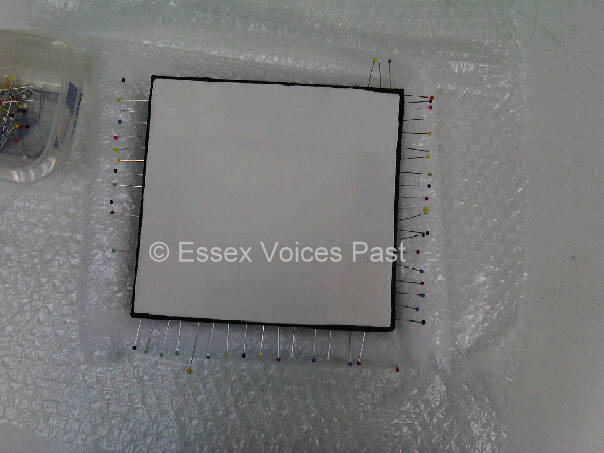
Day 10 – Mounting. The top of my work is being pinned into place. But first it had to be very carefully unpicked from the slat-embroidery frame. The grain has to be even all the way around and no lumps or bumps anywhere. This was very time consuming and took over an hour just to get the fabric correctly placed with the grain exactly right and the pins all put in. The photo here shows only half the pins that the work ultimately had to have!
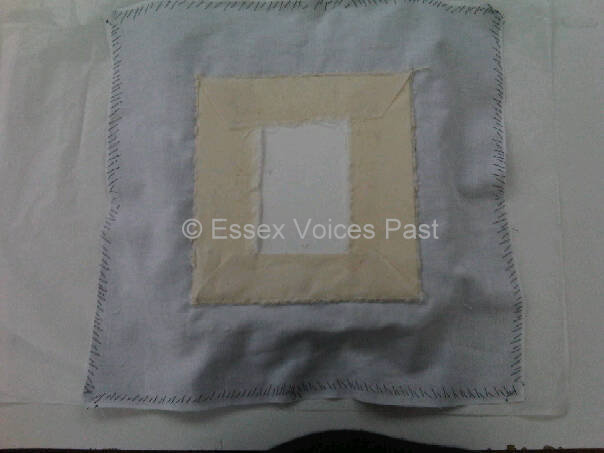 Day 10 – Mounting. Yikes. My work has had to be placed on a cushion of well-bundled up bubblewrap so that I can put it face down to work on it. The outside white fabric (with the black stitches) is the calico that my work was original stitched onto back on Day 1 and is the backing. There are hundreds of pins are all around the edge of the work attaching the work to the calicoed-board
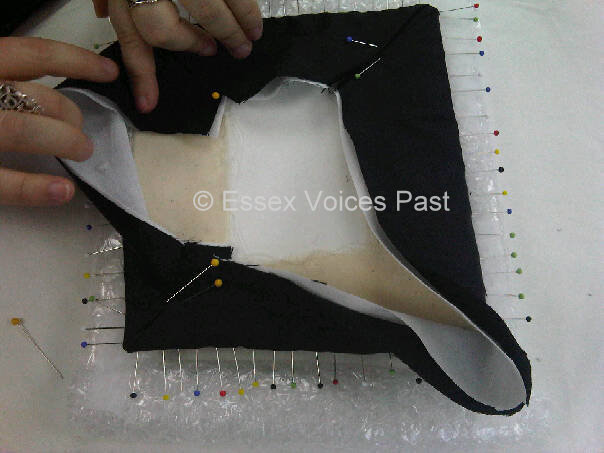
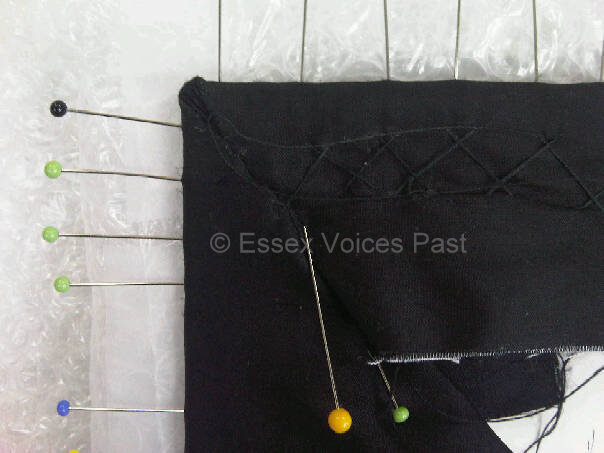
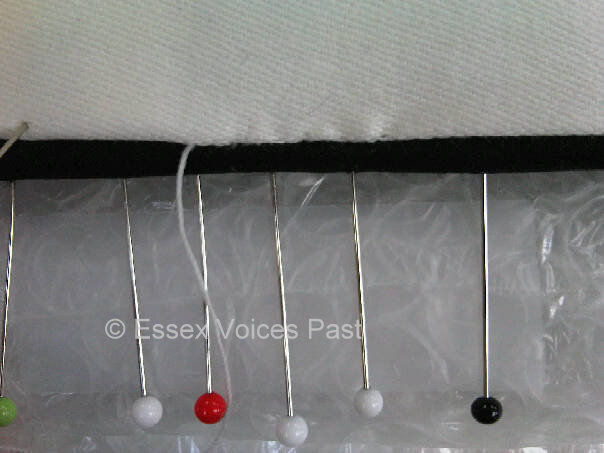
Day 10 – Mounting. Excess fabric has been removed. This photo shows the start of the mitring of the corners – all of which are being pinned into place. The hands aren’t mine but my tutors (I needed help with this!)
Day 10 – Mounting. Look closely and you will see black herringbone stitches along the edge. The corner is about to be mitred using slip stitches.
Day 10 – Mounting. This particular corner was a nightmare as the stitches have to be pulled really taut and my thread snapped twice doing this which meant I had to unpick and start the corner again. As it was 5pm, I gave up had to start again the next day/ This has to be done all the way around and then a nice backing of a material called “sateen” slip-stitched onto the back.
 Day 11 – Mounting. Using black double-threaded-waxed gutermanns thread didn’t work as it kept snapping on the corners. So instead I had to use white button-hole thread- much much stronger. The herringbone stitch shown on the back was covered up so it didn’t matter that it’s highly visible. The corners are slip-stitched and pull together so no thread is visible at all
Day 11 – Mounting. Corners and excess fabric being cut back

Day 11 – Mounting. Slip stiching the corner
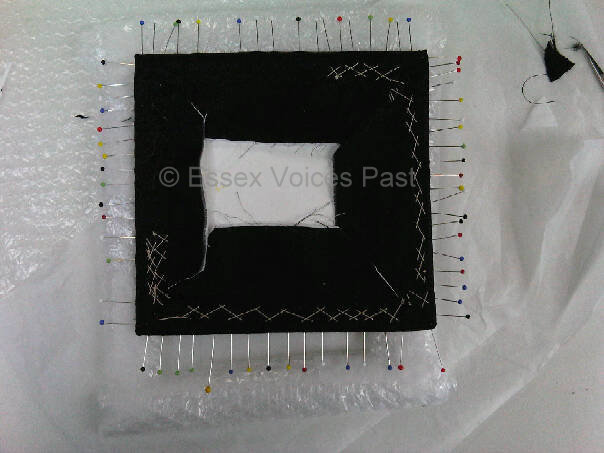
Day 11 – Mounting. The white backing folded to size and then pinned to the back. I could have used black silk backing material but as it was my first marked piece, I was advised to use a white backing material
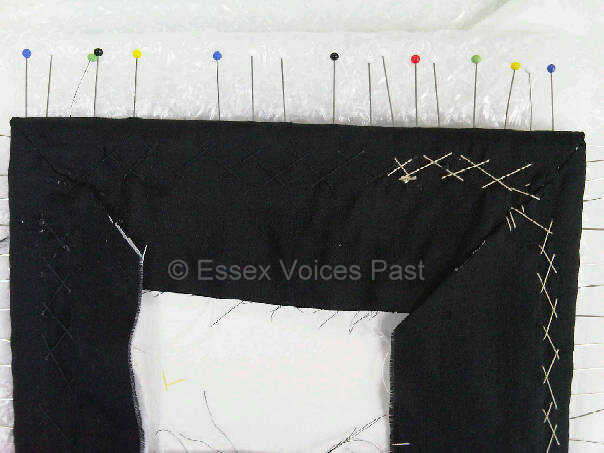
Day 11 – Mounting. Working from right to left, the area between the black pin and the red pin has been stitched into place with slip-stitches. Yeah – you can’t see my stitches!!!
Day 11 – Mounting. The backing has been slip stiched on
Day 11 – Mounting. Yeah – pins removed and the backing is all there! It’s taken so much effort to get the mounting and back done to perfection that I think I’ll frame it with glass on the back of the picture as well as on the front. That way I can flip the picture over onto the back so that people can admire my beautifully tiny stiches on the back!
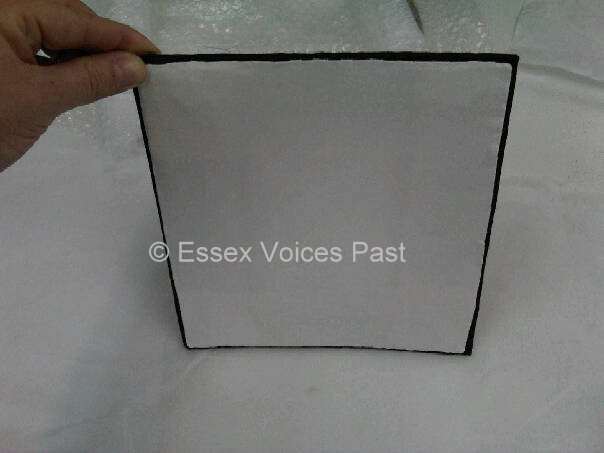
 Day 11 – Mounting. That’s it!! All done and finished. The final task was to remove all the pin holes around the edge of the work and remove any fluff etc on the work. My work was handed handed in and marked by 2 RSN-trained graduates and an external marker. (I got in the mid 70s%)
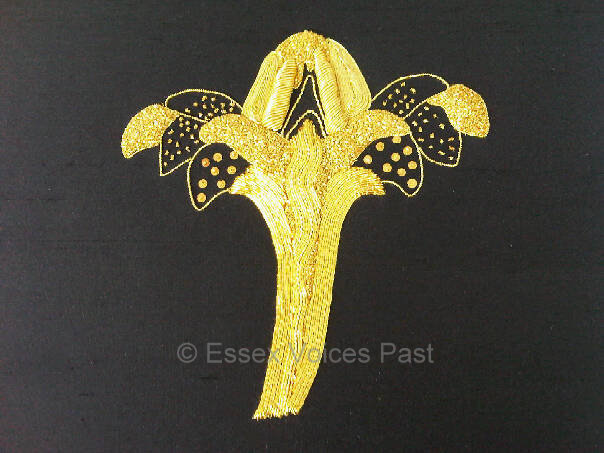
I finished this work sometime in 2010 but unfortunately have not been able to get back to the Hampton Court because of personal commitments. During 2011, in the days immediately after the Royal Wedding of Prince William and Kate Middleton, the Royal School of Needlework was in the media spot-light because they made the beautiful lace in Kate’s dress. The course director of the Certificate in Technical Hand Embroidery (who, along with many other extremely talented tutors, had personally embroidered & made the lace for Kate’s wedding dress) contacted me and asked if the RSN could use my work in their display cases to show off the work of their students. I am very proud to say that my William Morris Flower is now in the display cases in the studios at the Royal School of Needlework in Hampton Court for visitors to look at.
My posts over the last couple of days have, I hope, shown the story of just one piece of goldwork. The next time you look at military, religious or royal robes embroidered with gold, think of those ladies (and men) of the Royal School of Needlework busy embroidering in their beautifully historic William and Mary apartments at Hampton Court. The RSN may not have been totally responsible for the craftsmanship in the ornate robes you saw in all the pageants that were part of this weekend’s Diamond Jubilee Celebrations. However, most likely one or more hardworking and extremely skilled craftsman responsible for those spectacular robes was probably trained at this incredible school.
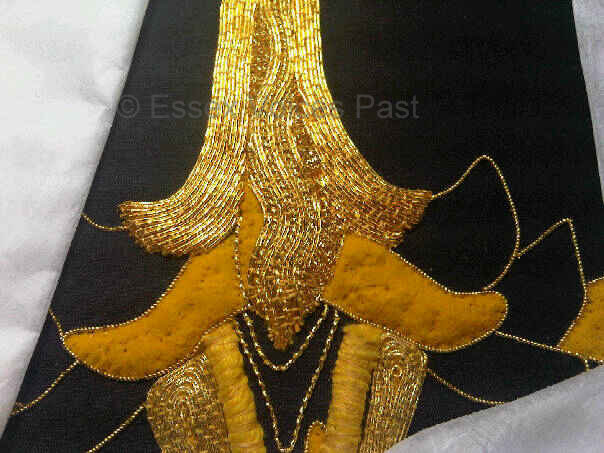
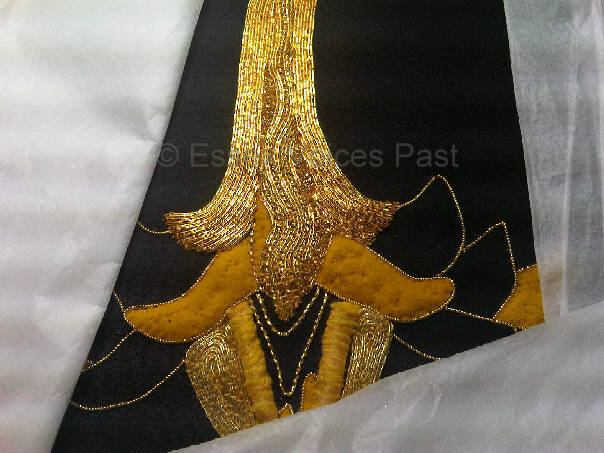
The Lord Chancellor’s Purse for the Queen’s Speech
 The Lord Chancellors Purse.
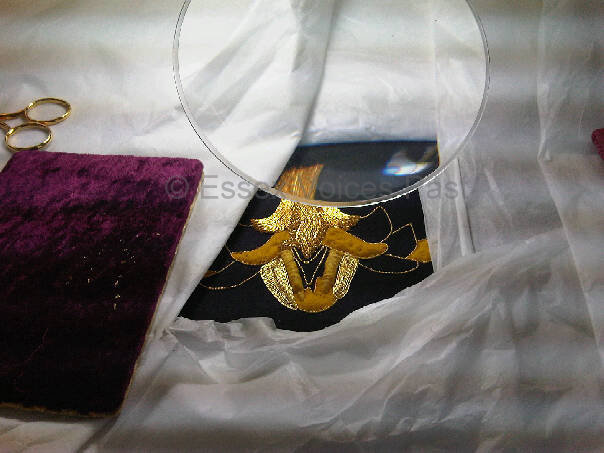
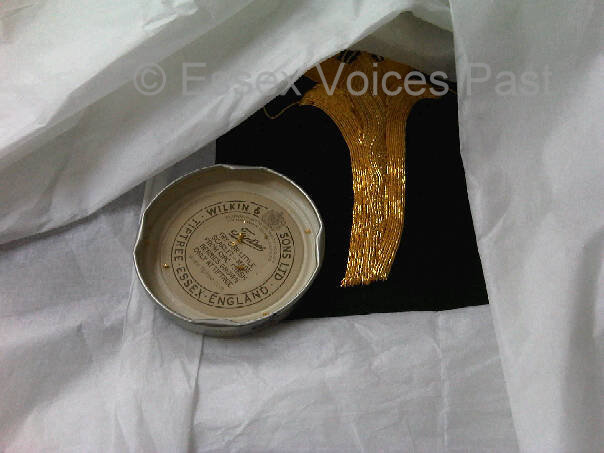
I wish I could say I embroidered this! But I didn’t. But I did get to touch it (gently and carefully) when I was at the RSN. This is a beautiful piece of State goldwork that the RSN first embroidered in 1984. It was brought to the RSN in 2010 for repair work before that year’s State Opening of Parliament. The top left tassel was very worn and needed repairing. Some of the embroidered goldwork needed replacing. The whole piece was very dusty and needed a good spruce up. What this photo doesn’t convey is that it is very large (for a purse!) and is in 3D. It’s about 3 foot square. It is also very heavy and the back shows a lot of wear and tear because whoever held it, had to balance it because of its weight (there is a much-worn handle on the back). The Lion and the Unicorn are both gold-stump work figures – ie heavily padded figures (padded with carpet-felt) that were made separately and then sewn onto the purse. The figures down the edges are the heads of angels and have the most beautiful faces. Again these are padded figures created separately and then sewn on. The stumpwork figures are about 2-3 inches in depth. The coat of arms uses a fabric called “Cloth of Gold” which, as the name implies is fabric woven with gold and is about £200 a metre. It is used by the Lord Chancellor to hold the Queen’s speech during the State Opening of Parliament.
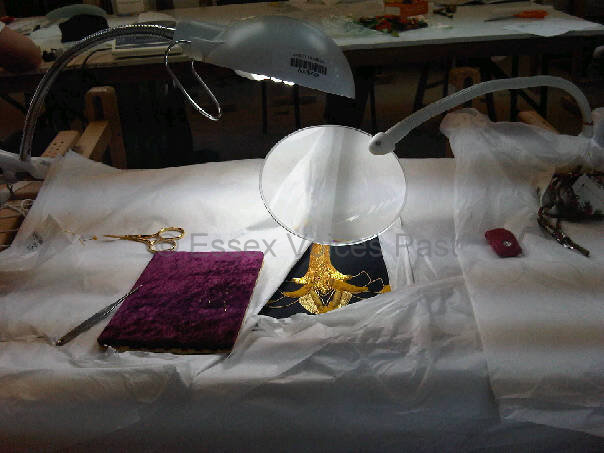
And I got to admire and touch it!!
© Essex Voices Past 2012-2013.


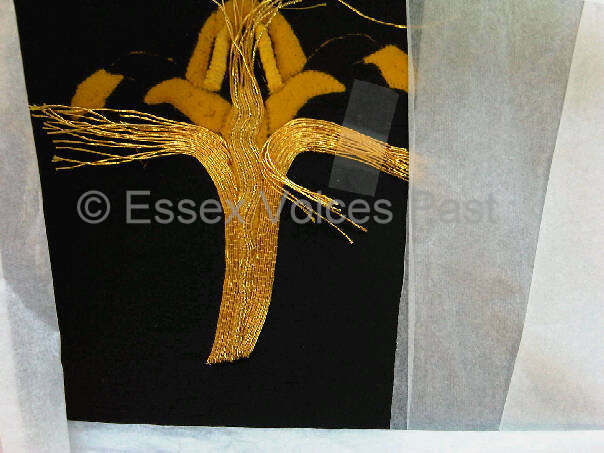
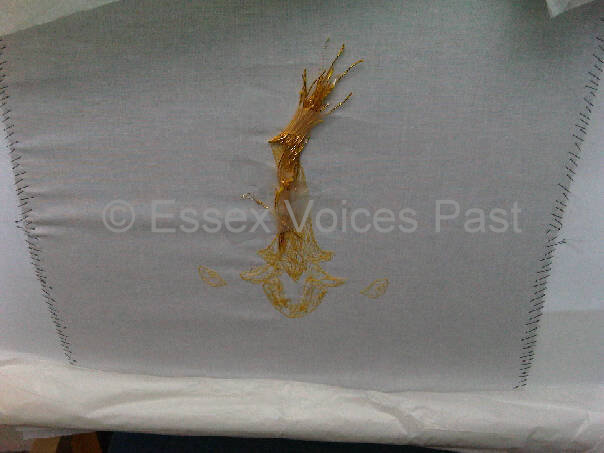
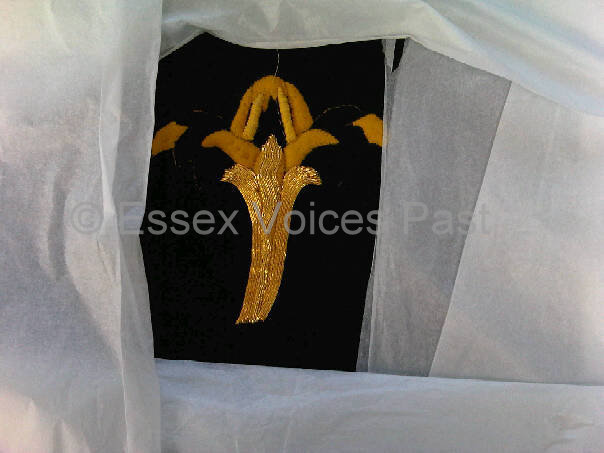
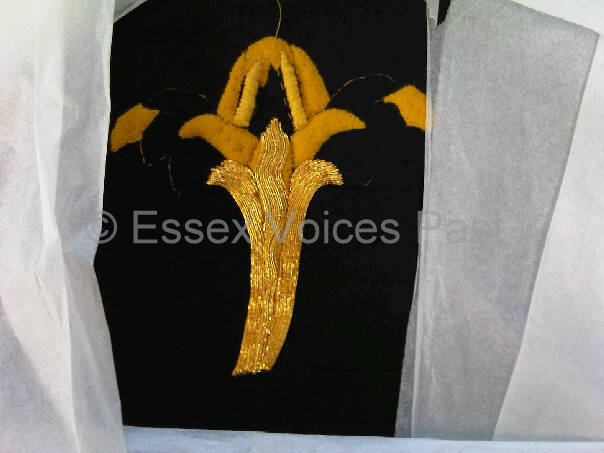
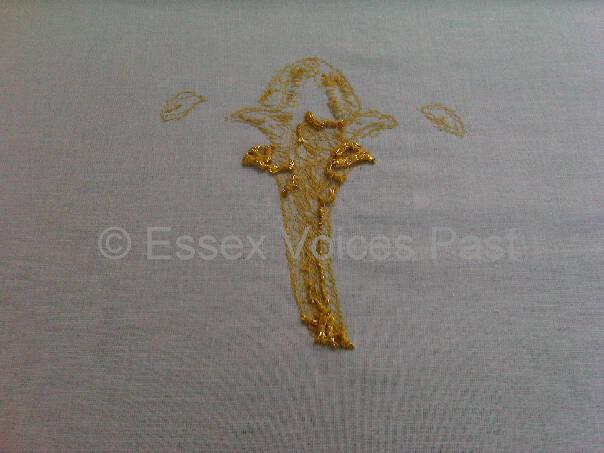

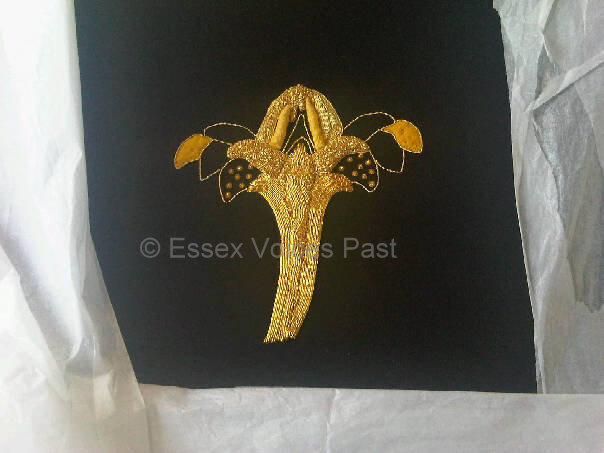
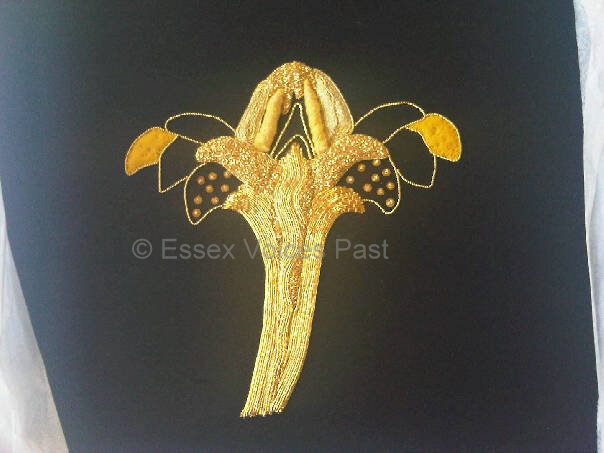
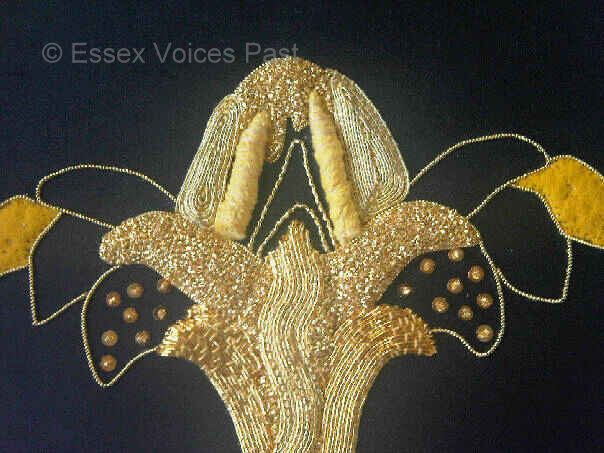
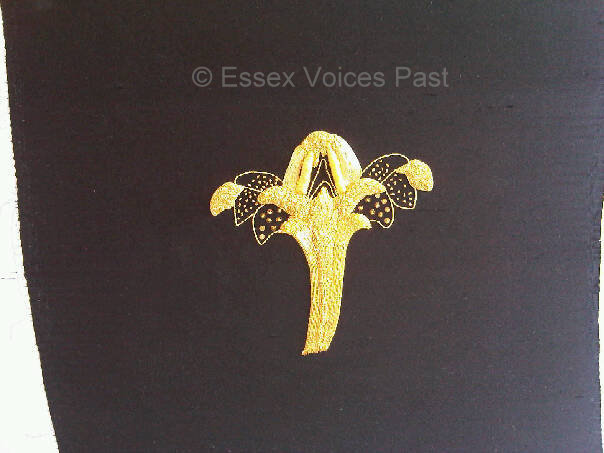
 Day 7
Day 7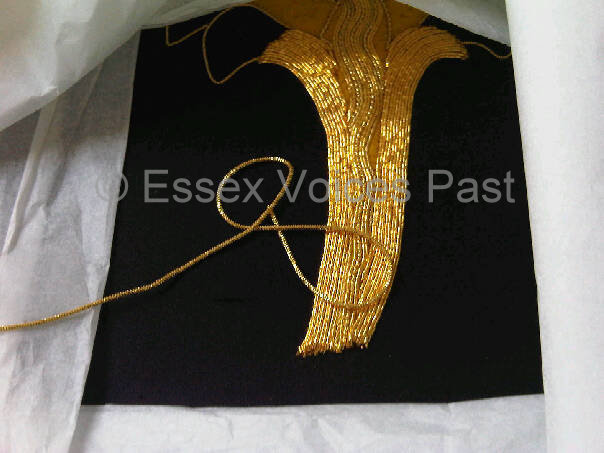

 Title page from the Bishops Bible (London, 1569),
 © Essex Record Office, Map Showing the Royal Progress of 1561 (2008)


 Canaletto’s River Thames on Lord Mayor’s Day 1746, © The Lobkowicz Collections


 Coronation Oath of Henry VIII with his own annotations (crowned 24 June 1509), shelfmark Cotton Ms. Tiberius D viii, f.89, © British Library Board. (For more information on his changes, see the British Library’s
 Coronation procession of Edward VI along Cheapside, London.
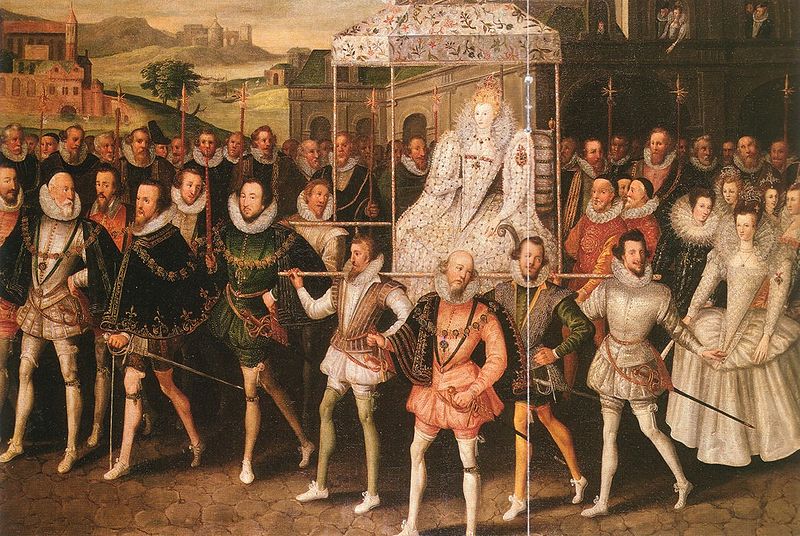
 Coronation procession of Elizabeth.